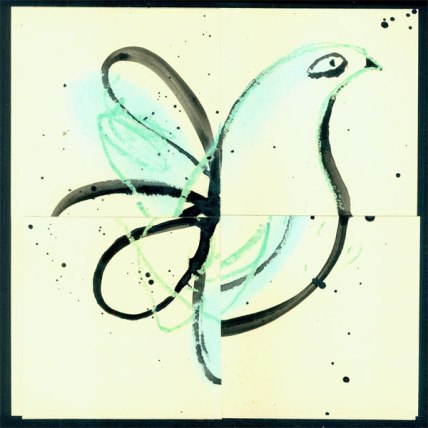
“Crazy Bird” watercolor, pastel and crayon on cut paper.
Here is a short tutorial of the “Crazy Birds” project that I taught 5th graders in Beijing, China! The video shows only marker, pen, and pencil, but you can modify it with any media you like, as I’ve done in the sample above.
Crazy Birds Tutorial from Silly U on Vimeo.
(If you have trouble viewing it through this blog, click the direct link here: http://vimeo.com/96276667)
___________________
CRAZY BIRDS
Supplies Needed:
– Four pieces of watercolor paper, about 5″x5″ or 6″x6″ square
– Four mark-making tools, such as pens, markers, watercolors, pastels, crayons
– scissors
– glue stick
Here are the steps:
STEP 1
Using two sheets of paper, draw a loose flower shape on one and a loose circle shape on the other. Use 2-4 different media. Work fast and loose!
STEP 2
Cut the flower and the circle papers into four equal pieces. Then, using another paper as a ground, arrange the pieces to create the beginning of a bird shape. Glue in place. Repeat if desired.
STEP 3
“Finish” the birds already started using the same combination of media used in Step 1.
This is a great project for anyone because it’s hard to go wrong! Please feel free to share with your friends, in your child’s classroom, etc. And send me some Crazy Birds!


Thank you so much for this tutorial, somehow it reminds me of the silly times you shared with me/us some time ago. I just love what you do! And I am sure going to try this bird! Waltraut
lovely!!!!!
It’s so cool to see you in Beijing! 🙂 And what a lovely way to begin a Sunday morning… listening at this video! Thanks, miss Carla! You are a doll,,, as usual! 🙂
What a great idea, Carla – I love this very much! You are always so inspiring!
Hi Carla, I loved this tutorial. I posted my birds on Flickr site’s Fairy Tale group for you to see. I ended up with seven birds and loved every minute of it. Thanks for your inspiration! I had so much fun and my family was smiling just watching me play and seeing my results!
I shared your video on Facebook. May have some friends over for drinks and drawing these birds too. Thanks!
thank you so much for sharing – will try this with my little great – grand after I have a
bit of play time.
Thank you, Carla, for this great project! I also loved seeing you and hearing your voice!
I love the surprised expression the top of your two birds. So cute.
So fun!
I’m making Thank You cards out of these. Thanks for the tutorial. Fun!
Oh this waS fun to do,sitting here in my pjs at home tonight! Thanks so much, Carla, and also thanks for the laughs every time you dropped your pen!! Haha!
Great tutorial! Thank’s Carla for sharing. You are an amazing woman. Your kind spirit shines through in your videos and brightens our world.
Love the video quality! Lighting and space….lovely asthetic for creation. Bird fun!
Thanks, Carla. Great video. I’m going to try it using watercolors…should be fun!!
Oh love this!
great tutorial – so simple and yet gives me a lot of inspiration! I’m going to try it!!
It’s such a joy to watch u work thanks for the tutorial off to play
Hi Carla, I loved this tutorial. Thank you for sharing it.
I have been checking in every so often for some time now and just couldn’t resist saying how beautiful all your ideas are. Thanks again for your encouragement and arty wisdom.
I LOVE watching you work! So fun! Thanks so much for sharing with us.
Had so much fun making these crazy birds! Thanks for sharing your video. So glad you had a great trip – but glad you are home safe! 🙂
Yet another fabulous Carla lesson. Thank you!!
Carla, this is magical!!! Thank you!
What a great tutorial! I really love your work and you inspire me. Thanks, I will definitely try it! The birds look so loose and natural.
I tried to comment on Vimeo but it wouldn’t let me; maybe not mobile-friendly? Anyway, what a great project! I’m going to do it w my kids, ages 4-13, and I think they’ll all love it. Which makes it a miracle. 😃 would love more like it!!!